
Print File & 3D Mockup Scanner
Pick a print product and upload your file to make sure nothing gets cut off and your print comes out sharp—plus preview it in 3D.
Select your Vivid Design Print Product & Upload Your Artwork
Upload (1) your full-color artwork PDF and (2) a vector template PDF using 100% K (solid black) for Spot UV / Foil areas and white for uncoated areas.
For one completely UV-coated side, fill that template page entirely with 100% K. On 4/4 jobs with 1-sided Spot UV, ensure Page 1 is the Spot UV side.
Keep Spot UV at least 5mm inside trimmed edges to prevent peeling. Full-bleed Spot UV files automatically receive a 5mm gap on press (leaving a visible non-UV border).
Positioning cannot be 100% guaranteed and may shift by ~1/16" on press. Avoid placing Spot UV on small text or very small images.
Ready to Print?
Order online with instant Canadian pricing and fast delivery across Canada.
Need Help With Your File?
Our design team can fix your margins, sharpen blurry logos, or build a custom design.
Quick Guide to the Lines
Three simple things we check so your print looks great out of the box.
1. Red Cut Line & Bleed
Paper shifts slightly when stacked and trimmed. Stretching your background color slightly past the Red Line prevents thin white strips on the edges.
2. Green Safe Box
Keep names, phone numbers, logos, and borders inside the Green Box so nothing gets accidentally trimmed off.
3. Sharpness & 3D View
We check that your file won't print blurry, and let you spin or fold your piece in 3D before you order.
Common Print File Questions
Straightforward answers to help make sure your design prints cleanly.
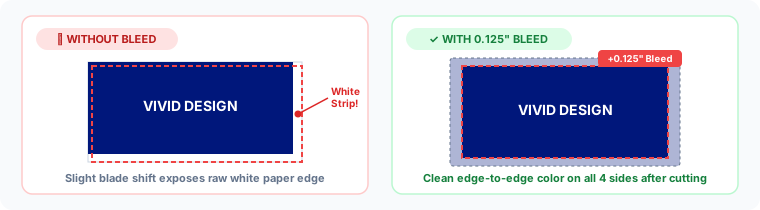
When stacks of paper are cut, the blade can shift by a tiny fraction of an inch. Extending your background color or photo 0.125" (1/8") past all four edges of the Red Cut Line ensures you never get accidental white strips along the edges.
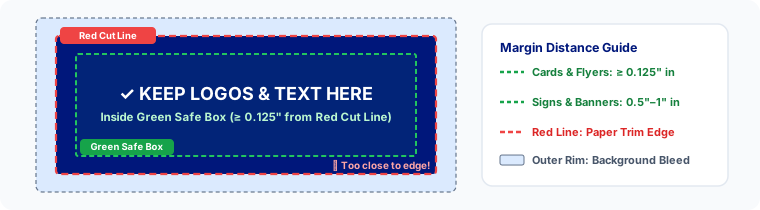
Keep names, phone numbers, QR codes, logos, and thin borders inside the Green Safe Box—at least 0.125" inside the cut line on business cards, flyers, and brochures (and 0.5"–1" on large signs and banners).
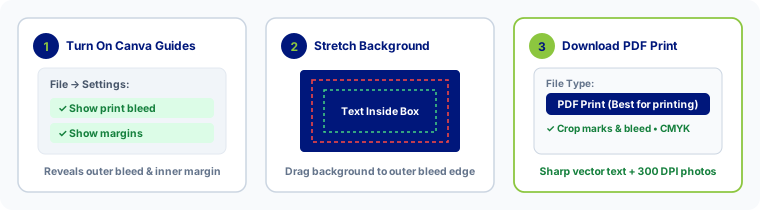
In Canva, open File → Settings and turn on Show Print Bleed and Show Margins. Stretch your background color or photo past the page edge to the outer bleed line, keep text inside the inner box, then click Share → Download → PDF Print.
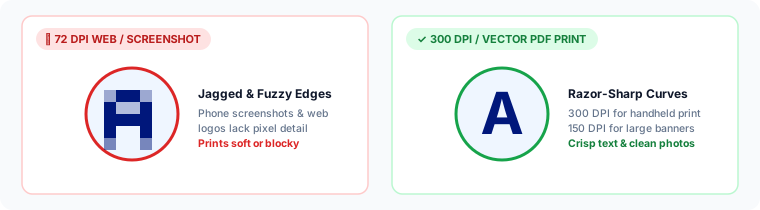
Screenshots and images saved from websites are usually 72–96 DPI, which looks fine on a phone screen but prints soft on paper. Exporting an original PDF Print file or a 300 DPI image (150 DPI for large signs and banners) keeps text and photos crisp.
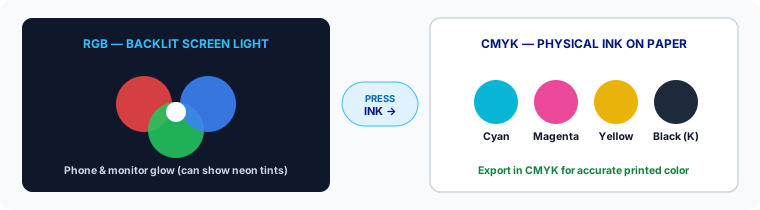
Phone and computer screens use bright backlit RGB light, while printing presses use CMYK ink on paper. Most everyday colors print very closely, though ultra-bright neon blues and greens on screen will print slightly softer in physical ink.
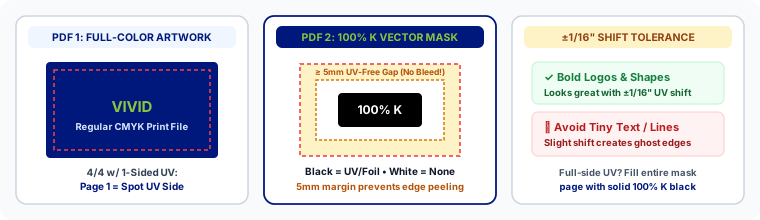
Please submit two separate PDF files: (1) your regular full-color artwork and (2) a vector Spot UV / Foil template PDF where coated areas use 100% K (solid black) and non-UV areas are white. For one completely UV-coated side, fill that template page entirely with 100% K; if ordering a 4/4 job with Spot UV on only one side, make sure Page 1 of your artwork is the Spot UV side.
Important 5mm Edge & ±1/16" Rules: Keep at least a 5mm (0.20") Spot UV-free margin inside all trimmed edges so coating does not peel along cut edges (full-bleed Spot UV files automatically have a 5mm gap applied on press, leaving a visible non-UV border). Because Spot UV positioning can shift by ~1/16", avoid placing Spot UV on small text or very small images.
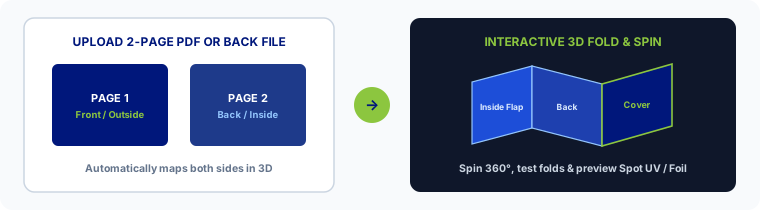
Upload a 2-page PDF into Step 3 (or drop a second file into Back Side), then click Interactive 3D Mockup to flip and fold your piece in 3D. Want us to fix your margins or design it for you? Get help from our design team or check our Artwork Setup Guide.